As you may have heard, an IT engineer is powered by coffee. While not always true, it definitely is in my case. I love coffee, and I’m a big fan of Italian coffee style: mainly espresso.
For a few years, I was a moderately happy owner of an Ascaso Dream espresso machine and i2 mini grinder. They create a nice set and the coffee was… OK. Espresso was hit-and-miss, but mostly miss, and it always frustrated me that an espresso at a regular coffee bar, like Costa, is much better.
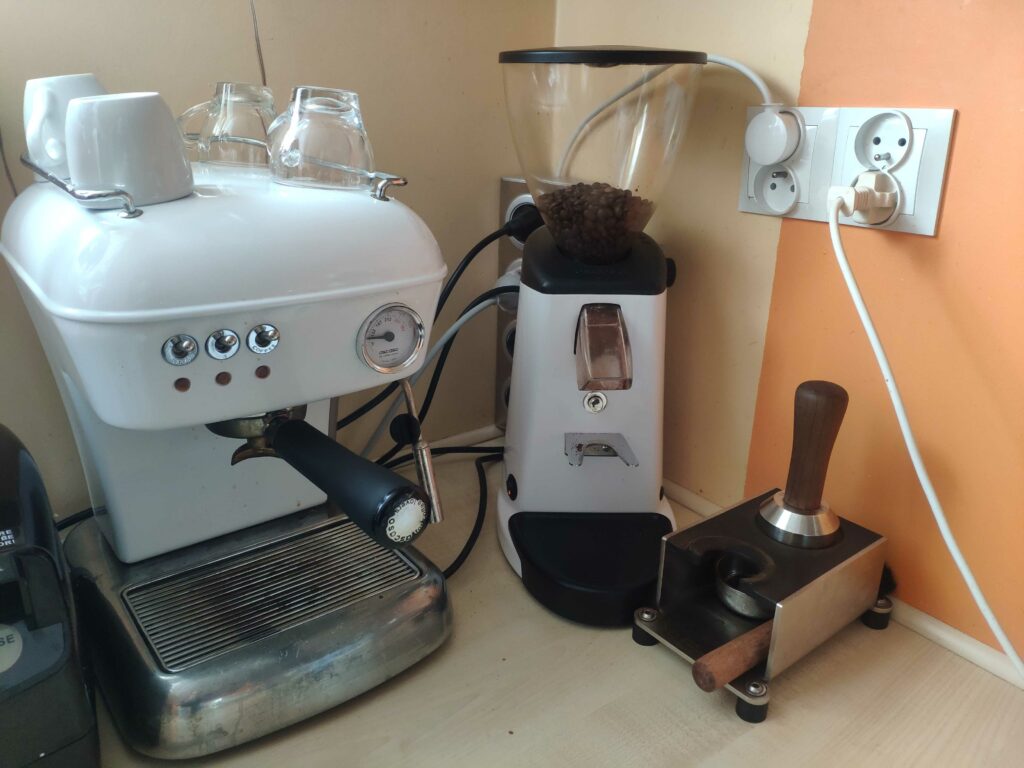
My Ascaso Dream, i-2 mini grinder and the tamper station
If my espresso quality is subpar, then what is required to get a good espresso? I started to check again what is considered important when making espresso. The non-ultimate list is:
- first and foremost, a good grinder that can get you the needed fine-grained coffee powder of uniform distribution
- precise water temperature control (and good water quality in general)
- water pressure control (should be 9 bar, at least as a start value)
- even distribution, tamping and extraction of coffee puck in the basket (this can be a hard one)
- repeatability and control over everything mentioned above.
After a long break, I got back to a polish coffee forum, where I wanted to check if someone figured out how to make better coffee using hardware I have. I learned there that one folk has basically remade his Ascaso Arc (same hardware, different case than my Dream), added an AT Mega based MCU and turned it into a beast. That started me off. I started to read about how espresso machines are made and how they work, and I found a few open source projects on GitHub, where people create a firmware for home class espresso machines. That was it - at this point, I knew what my next big hobby project is.
This blog entry starts a series of note-to-future-self entries, where I want to document where I found stuff needed to fix and make the open source espresso machine based on Gaggia Classic.
The firmware projects I found are:
- https://github.com/Zer0-bit/gaggiuino
- https://github.com/rancilio-pid/ranciliopid and its fork https://github.com/medlor/bleeding-edge-ranciliopid
The first project on the list is aimed at Gaggia Classic machine, while the second one supports a few machines, mainly Rancilio Silvia, but also Gaggia Classic. I read about the projects, compared them, checked on the features and decided to go with ‘ranciliopid’ or its fork. So, I created a plan and arranged it in stages:
- stage 0
- buy a used Gaggia Classic
- learn how it’s built, repair it (if needed), clean it and make nice
- make it work as the original design intended to
- add precision baskets, precision shower filter and an NPF (naked portafilter - it doesn’t change the taste of coffee, but allows you to better see how your extraction works and looks awesome - I always wanted to have one :) )
- stage 1 - add ESP32 MCU in the “full” scenario, with features including
- digital control through relays of all the main electric components: 3-way valve, pump and heaters, and the TSIC 306 temperature sensor, which allows for:
- very precise temperature control with PID controller (with 1 **°**C resolution)
- timed shots: the machine stops after the set number of seconds
- pre-infusion: when a brew starts, the machine first pumps water for a brief moment of time (like 2 s), then takes a short pause, then starts the actual extraction - this presoaking of coffee allows getting rid of the air trapped in between the coffee powder and should make your extraction more even
- backflush: a cleaning mode, where brew group is first pressurized (with a blind sieve/basket attached), then expelled through the 3-way valve to the drip tray
- add an OLED screen
- configure MQTT integration
- insulate the boiler of the machine to eliminate the gigantic heat loss of the naked metal boiler and speed up the heating process on start
- add a water level sensor: to tell you when you run out of water, so you’re not surprised mid-brew
- figure out how to place all of that in the machine, add necessary case for the electronics
- digital control through relays of all the main electric components: 3-way valve, pump and heaters, and the TSIC 306 temperature sensor, which allows for:
- stage 2 - add scales
- Good espresso needs to have a correct extraction ration and extraction time. Extraction ratio is the ratio between the weight of your final product - the espresso in your glass - to the weight of coffee beans used to make it. There’s no single correct value, but in general people agree that your extraction ratio should be somewhere between 2-3x (so from 10 g of freshly ground coffee powder you should get 20-30 g of espresso). As for time, the typical value is 25 s, but it also can vary between 20-30 s. So, to make your coffee right, you need to find (dial in) your grinding settings for a specific coffee to land within these ranges. The basic option is to set your brew time to a constant value, like 25 s, then change your grinding setting until you get the 2-3x extraction ratio. But to be able to tell the ratio, you have to put a scale under your espresso glass when you pull the shot. Now, the firmware that I want to use (and gaggiuino is working on it as well) has a killer feature: you can integrate a scale into your drip tray and connect it directly to the ESP32. That way, you can start making your coffee by weight: your machine will stop the extraction when you reach a certain weight of espresso and will tell you how much time that needed. This is my next stage after the basic functionality.
- stage 3 - features that need to be created and I would like to help contribute
- Pressure profiling: this is the hot topic in espresso world (as far as I’ve seen). The idea is that you add 2 hardware elements: a water pressure sensor to check the pressure of water flowing through your coffee puck and an AC light dimmer, which you can use to cut down the power of the water pump. By cutting the power of the pump, you make the pump lower the extraction pressure. Controlling the pump using data from the pressure sensor, you can create a pressure profile of water during your extraction. Ideas that I’ve seen so far are based on linear change, so for example your brew starts at 9 atm but then falls down to 6 atm at the end of brew. Still, everything is possible - you just have to create a code that can execute that.
- Drip tray overflow warning. Since the scale I want to integrate into my machine is actually based under the drip tray, it should be possible to get the weight of the tray when it’s almost full of water, then display a warning for me that I should empty it. Sounds simple and useful.
- Automatic extraction rate brewing. As I explained above, you can either brew your espresso by time (for a given number of seconds) or until it reaches a certain weight (like until we get 30 g of espresso). The problem that I see with that second method is that my initial coffee powder weight might vary. I’d like to try to integrate a digital scale connected to the espresso machine’s MCU, that weights how much coffee powder has my grinder produced. Having this information in the MCU, I can stop the extraction when the ratio reaches a specific configured extraction rate, like 2,5 x.
Wrapping up
This is going to be a long project for me, but I’m actually writing this after already (almost) completing my stage 1. In this blog series, I want to save a set of “notes for my future self”, so that I have a written reference when I need to service my own machine again.
In the next few entries, I’ll try to start by explaining how an espresso machine works and how you can repair it if you have to.
 How a single boiler espresso machine works?
 Repairing the Gaggia Classic
 Short espresso machine project update